Category: From the Garden

Green with Patience: Protecting Tomatoes and Pollinators

No Comments

Some parts of our garden have rushed headlong into summer, while others seem determined to take their time. The zucchini and yellow squash continue to flourish, giving us more to pick every time we walk through the garden. Meanwhile, the tomatoes have moved at a much slower pace this year.

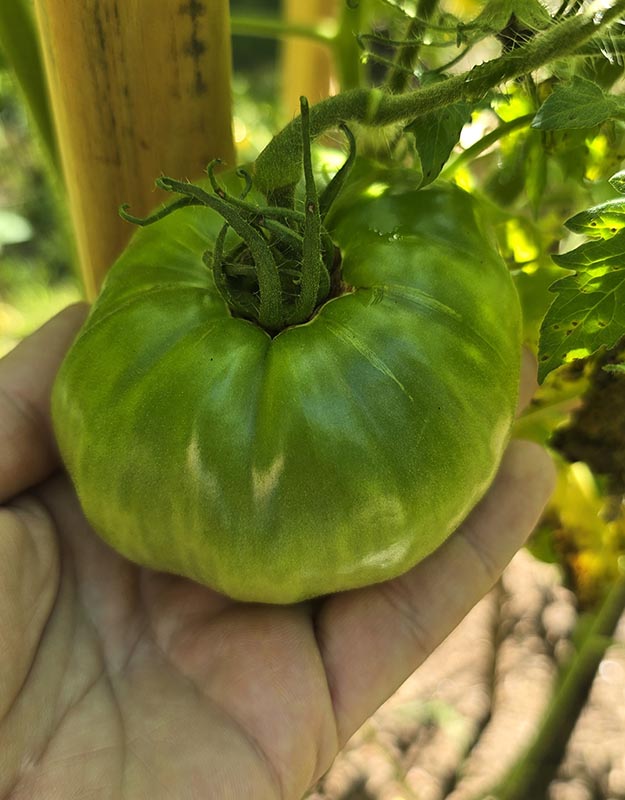
The large green tomato in this photo grows on one of my heritage Mortgage Lifter plants. I could not resist slipping my hand beneath it to feel its weight and admire the promise of what may still come. After spending so much time pruning, tying, inspecting, and worrying over these plants, finding a tomato this size feels encouraging.

Hornworms Never Miss a Meal

Unfortunately, the hornworms have also noticed the tomatoes.

These large green caterpillars blend almost perfectly into the foliage, but their appetites quickly reveal them. We have already found several, and one managed to eat nearly an entire smaller tomato plant before we caught it. When you grow without routinely using pesticides, checking each plant becomes part of the daily garden walk.

We remove the hornworms by hand whenever we find them. However, the amount of damage convinced us that we needed another layer of protection. We chose a spinosad product labeled for tomatoes. Spinosad comes from a naturally occurring soil microorganism and disrupts the nervous system of insects that eat or come into contact with it.

Some Spinosad products qualify for organic gardening, but organic does not automatically mean harmless to every insect. Protecting tomatoes and pollinators requires careful timing because wet Spinosad can harm bees. Therefore, we follow the label, avoid spraying open flowers, and apply it after pollinators have finished working for the day.

When the Rain Keeps Coming

Constant rain has caused problems in several areas of the farm. We have already battled drainage issues at the does’ barn, and the tomatoes have suffered as well. Repeated rain damages the leaves and creates ideal conditions for fungal and bacterial diseases.

Although I have pruned the plants heavily, tied the vines up, and tried to improve airflow, the leaf damage continues. We recently applied a copper fungicide in hopes of slowing its spread.

Copper fungicide leaves a protective coating on the foliage. Copper ions interfere with proteins in fungi and bacteria, which helps prevent new infections from becoming established. However, it cannot repair leaves that already show damage.

Copper generally poses little direct risk to bees, but we still use it carefully. Too much can injure plants, accumulate in the soil, and harm aquatic life through runoff. Moderation, timing, and label directions matter with both products.

For us, protecting tomatoes and pollinators means paying attention, choosing the narrowest tool available, and using it only when necessary. Despite the hornworms, spotted leaves, and slow-ripening fruit, we remain thankful for the rain. We only hope it begins to ease the drought our mountains have carried and leaves us enough tomatoes for a very good sandwich.

Categories: From the Garden

Building Bert’s Greasy Bean Trellis

No Comments

Why Bert’s Greasy Beans?

Bert's Greasy Bean Trellis

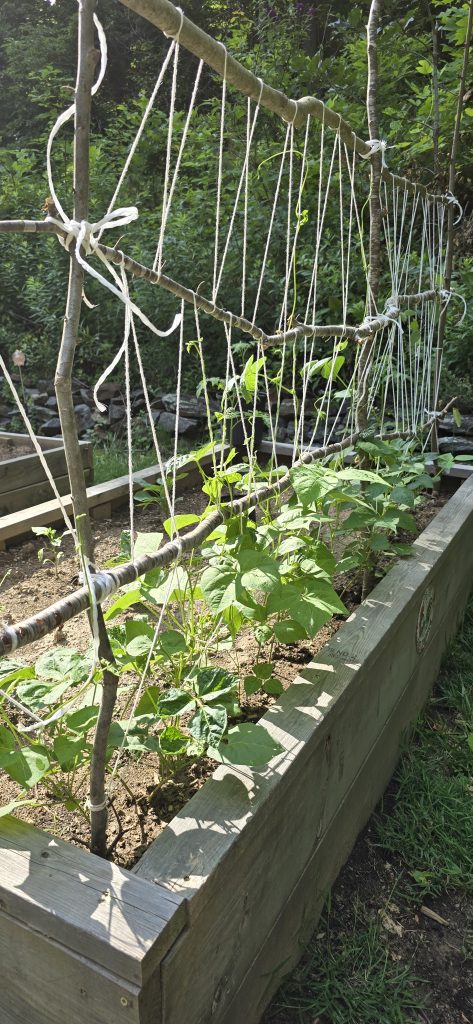
My Bert’s Greasy Bean trellis started with small saplings that already needed thinning, cotton string I already had, and poly twine left over from other projects.

In other words, this trellis cost me nothing out of pocket this season.

I chose Bert’s Greasy Beans because they belong to this area in a way that feels specific and practical. They are not just another bean in a seed packet. Around here, greasy beans show up as a specialty bean at the farmers market, and they tend to sell out fast because people know what they are. Demand stays high, and supply stays limited, which tells me they are worth growing if I have the space and the patience.

Building the Trellis from What I Had

For the Bert’s Greasy Bean trellis, I set one sapling upright on each end and one in the middle. Then I lashed more saplings horizontally across the three posts. Between each level, I zig-zagged cotton string into little triangles so the vines would have plenty of places to grab.

At first, the trellis surprised me. The first two horizontal saplings made the whole thing feel sturdy enough that I stood back and thought, “Well, look at that actually working.” However, as I added more levels and the beans traveled higher, the trellis started to flex a little more. That makes sense. Bean vines may look delicate, but once they climb, leaf out, and start producing, they bring real weight with them.

So, I may add support lines later to keep the trellis steady. For now, though, it is doing exactly what I need it to do.

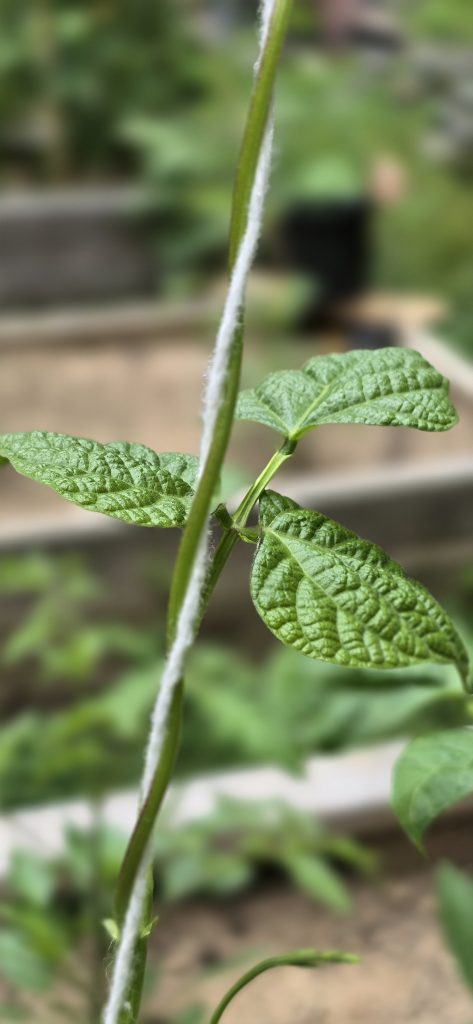
The best part came the next morning after I added another horizontal branch. The vines had already found the string and started curling around it. They did not need a fancy garden structure or anything from a catalog. They just needed something to climb.

Planning for Leather Britches and Seed Saving

Last year, I grew greasy beans and dried all of them into leather britches. Traditionally, people threaded the beans in their pods and hung them to dry. I used a dehydrator instead, because I like old ways, but I also appreciate a plug and a button when life is already full.

After drying, you soak leather britches overnight. Then, the next day, you cook them like greens with salted pork or fatback. This year, I hope to save some beans for seed, dry more for shelf-stable vegetables, and keep building food storage that does not all depend on canning.

That is why this Bert’s Greasy Bean trellis makes me happy. It uses what I had, supports a bean that belongs here, and helps turn a cleared patch of saplings into food for later.

Use what you have. Thin what needs thinning. Let the beans climb.

Categories: From the Garden

Rhythm of Late April

Spring never arrives in just one grand entrance on a small farm. It shows up in layers: new chores, shifting routines, seedlings asking for more room, and the constant glance toward the sky hoping for rain. The month has brought plenty to do here at The Tart Farm, along with the reminder that every season has its own pace. Now we are finally falling into step with the rhythm of late April.

The hens have been laying well, but they have also made their feelings clear about the new nesting boxes. Lately, more eggs have been appearing on the ground instead of in the boxes, which usually means the accommodations need a little improvement. In this case, the boxes need deeper nesting material to make them more inviting.

That will be one of the next small but important fixes. Chickens are wonderfully productive, but they are also creatures of habit and comfort. Sometimes the smallest adjustments make all the difference.

Read More